Getting Started with Nodemcu
Many people asked me to programme NodeMCU with Arduino IDE so I decided to write this guide.
Installing the NodeMCU Support for the Arduino
- First open the Arduino IDE
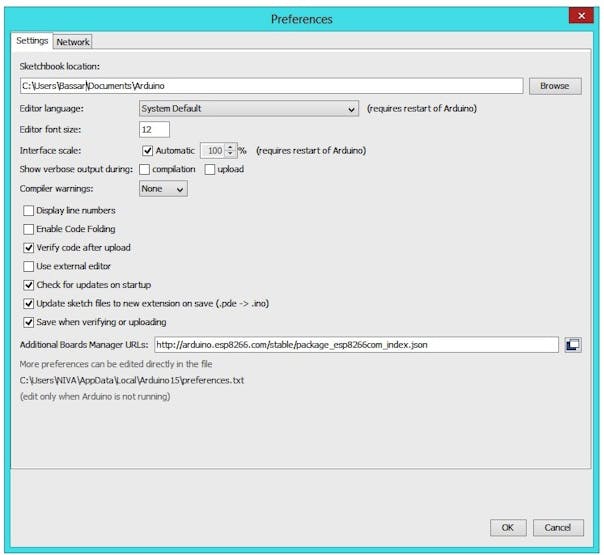
- Go to files and click on the preference in the Arduino IDE

- Paste below URL in the Additional boards Manager
http://arduino.esp8266.com/stable/package_esp8266com_index.json
- click OK, It will close the preference Tab.
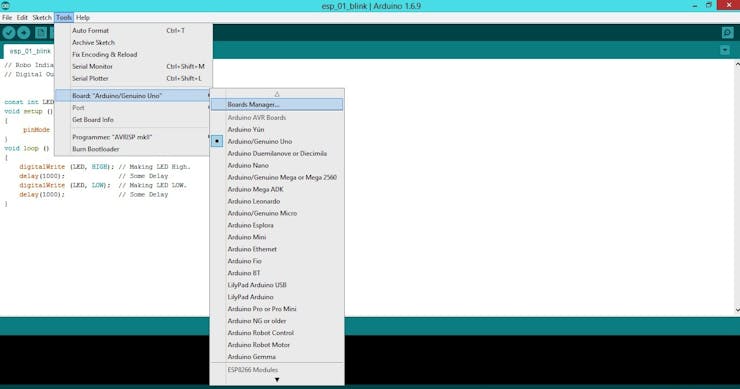
- Now, Go to Tools and board, and then select board Manager

- Navigate to ESP8266 by ESP8266 community and install the software.

- Once all the above process is completed we are ready to program our NodeMCU with Arduino IDE.
Lets Test It With Blink Programme
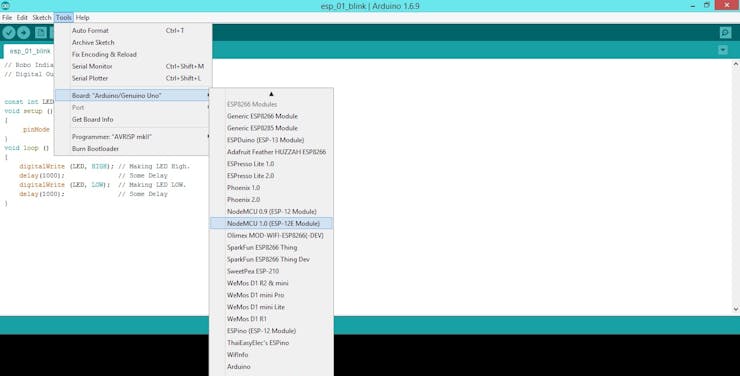
- Now, go to Tools, board and select the type of NodeMCU you have

- Then select the correct COM port to upload the program on your NodeMCU
- Now Copy Paste the below programme and upload it.
- If you did everything correctly then, your led should blink continuously.
If you have any query or issue please comment below.
void setup() {
  // initialize inbuilt LED pin as an output.
  pinMode(13, OUTPUT);
}

// loop function runs over and over again forever
void loop() {
  digitalWrite(13, HIGH);   // turn the LED on by making the pin 13 HIGH
  delay(500);              // wait for a 0.5 second
  digitalWrite(13, LOW);    // turn the LED off by making the pin 13 LOW
  delay(500);              // wait for a 0.5 second
}
Thanks So much Pcbway
Bill of materials used in this project
Nodemcu
1600+ Projects Sponsored
Posted in
Arduino,
Nov 15,2019
832 viewsReport item
- Comments(0)
- Likes(1)
You can only upload 1 files in total. Each file cannot exceed 2MB. Supports JPG, JPEG, GIF, PNG, BMP
0 / 10000


